First-Time Setup
These steps are one-off. Once your sensors are installed and everything is charged, your pre-flight routine takes under two minutes.
1.1 What's in the Box
1.2 Charge Everything
Receiver: Connect via USB-C to any 5V charger. A full charge from empty takes approximately 2 hours.
- Solid amber — charging
- Solid green — fully charged
Sensor modules: Each of the four modules has its own USB-C port. Charge all four before first use. Sensor battery life is designed to last up to a full flying season on a single charge, so routine recharging between flights is not normally needed.
1.3 Install Sensor Nodes on Your Wing
Sensor installation takes 5–10 minutes the first time. Once installed, the sensors stay in your wing between flights — you pack and fold the wing normally with them in place.
Where to position them:
The left and right nodes are positioned symmetrically in relation to the wing centre. Each node goes at roughly 60% of the total wingspan measured outward from the centre. You do not need precise measurements — count cells to estimate the approximate span position for your wing.
Important: The nodes must be positioned inboard of the big ears fold line. If a node sits in a cell that folds under during big ears, the readings will be disrupted and the modules could shift. Check where your wing's outer A-risers attach and place the nodes at least one cell inboard of that line.
Chordwise (front to back), place the pair around the middle of the chord. The exact fore-and-aft position is not critical — ParaBaro measures the difference between the pressure inside and outside the wing — but mid-chord gives the most stable, repeatable reading. Keep the modules clear of the big-ears cells (see the note above) so the manoeuvre does not disturb them.
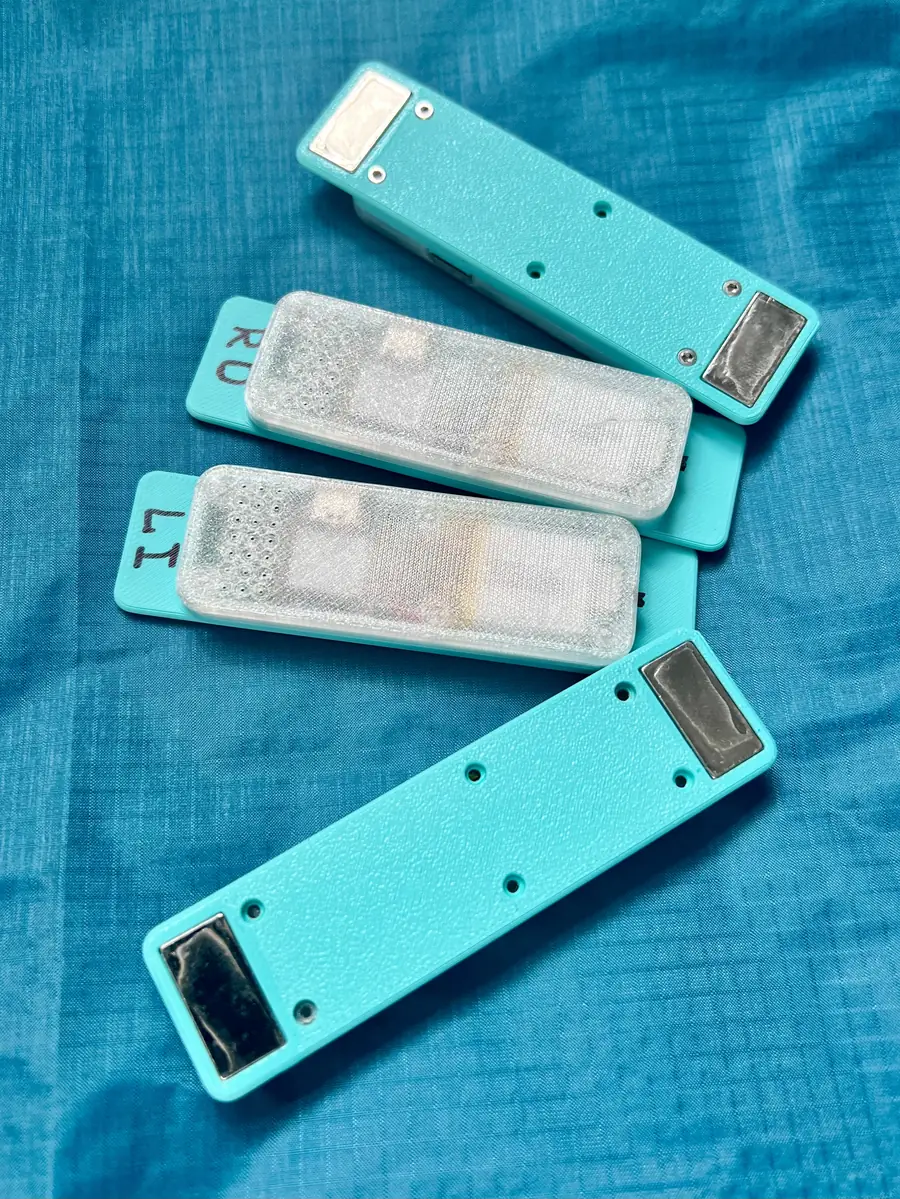
How to install each node:
- Lay the wing out flat.
- Identify the target cell at roughly 60% span on each side, ensuring it is inboard of the big ears fold line.
- Slide the internal module through an open cell at the leading edge, working it into the target cell. The internal module will sit inside the canopy, measuring pressure inside the cell.
- Place the external module on the bottom surface of the wing, directly opposite where the internal module now sits. The magnets in both modules pull them together through the fabric.
- Confirm the two modules are held firmly against each other through the wing material. No clips, adhesives, or wing modifications are needed.
How differential pressure measurement works:
The internal module measures the air pressure inside the cell. The external module measures ambient air pressure outside the wing. The difference between these two readings is the inflation pressure at that point. When a cell begins to collapse, internal pressure drops toward ambient — the gap closes. ParaBaro tracks this in real time for both the left and right sides of the wing, which is what enables asymmetry detection.
1.4 Mount the Receiver
Clip the receiver to your harness chest strap using the integrated clip on the back of the case. Position it so the screen is visible during flight without requiring you to look away from the wing.
1.5 Register Your Device
Before your first upload, register your receiver to your account so your flights are filed under you automatically. Log in to your Pilot Dashboard at aviometrics.com, open your profile, and press Register Device. Enter the device ID shown on your unit, in the form ParaBaro-XXXX. Each pilot registers one device during the beta.
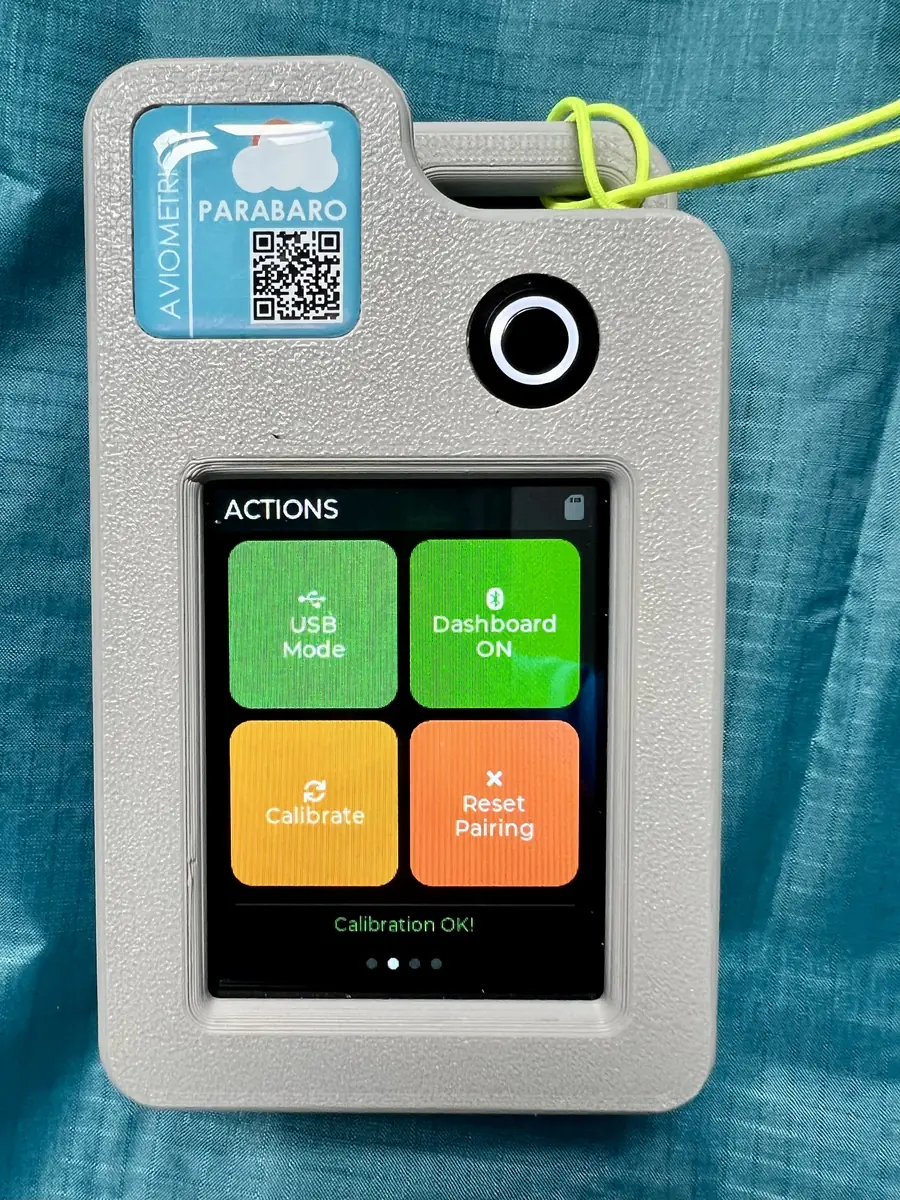
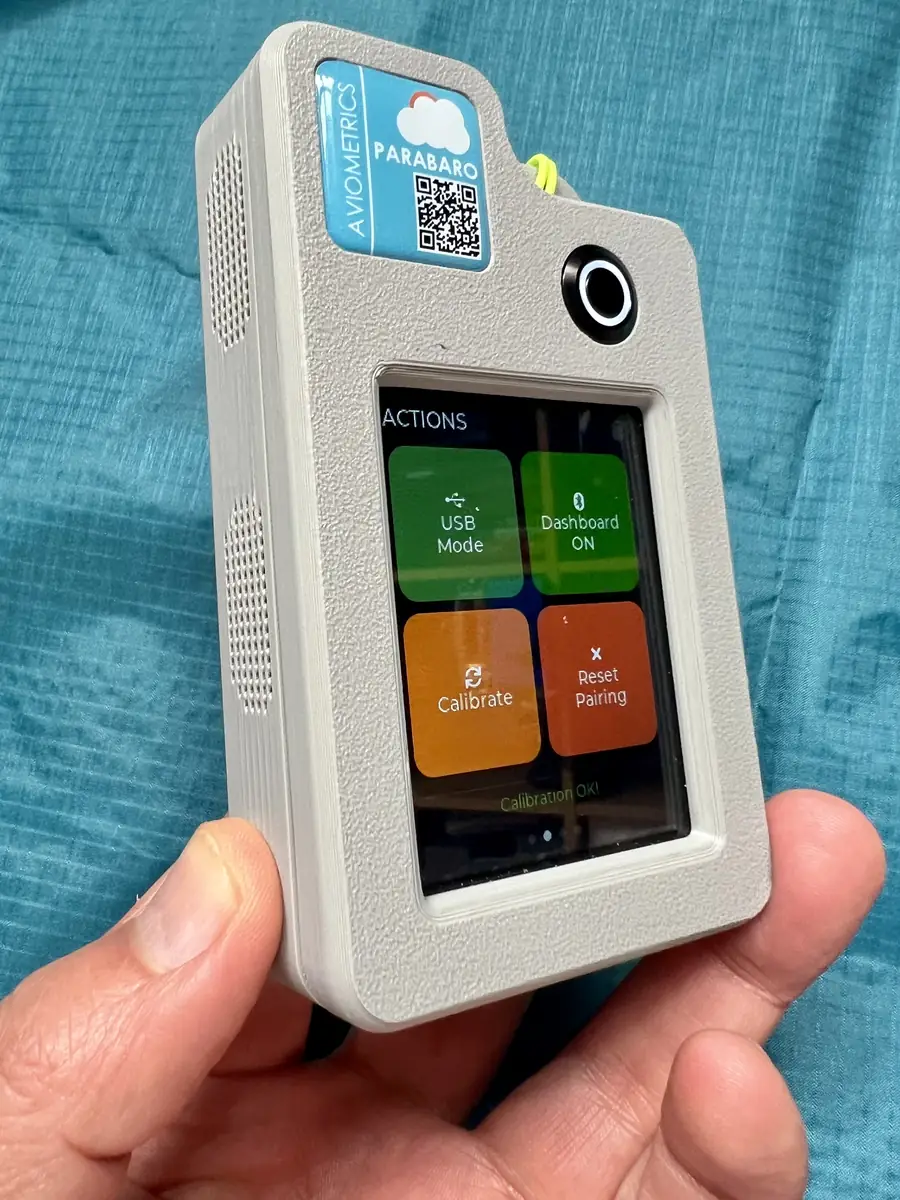
On the device itself, open the ACTIONS screen and switch Dashboard ON. This turns on the receiver's connection to your online dashboard — without it, the device will not sync with aviometrics.com.
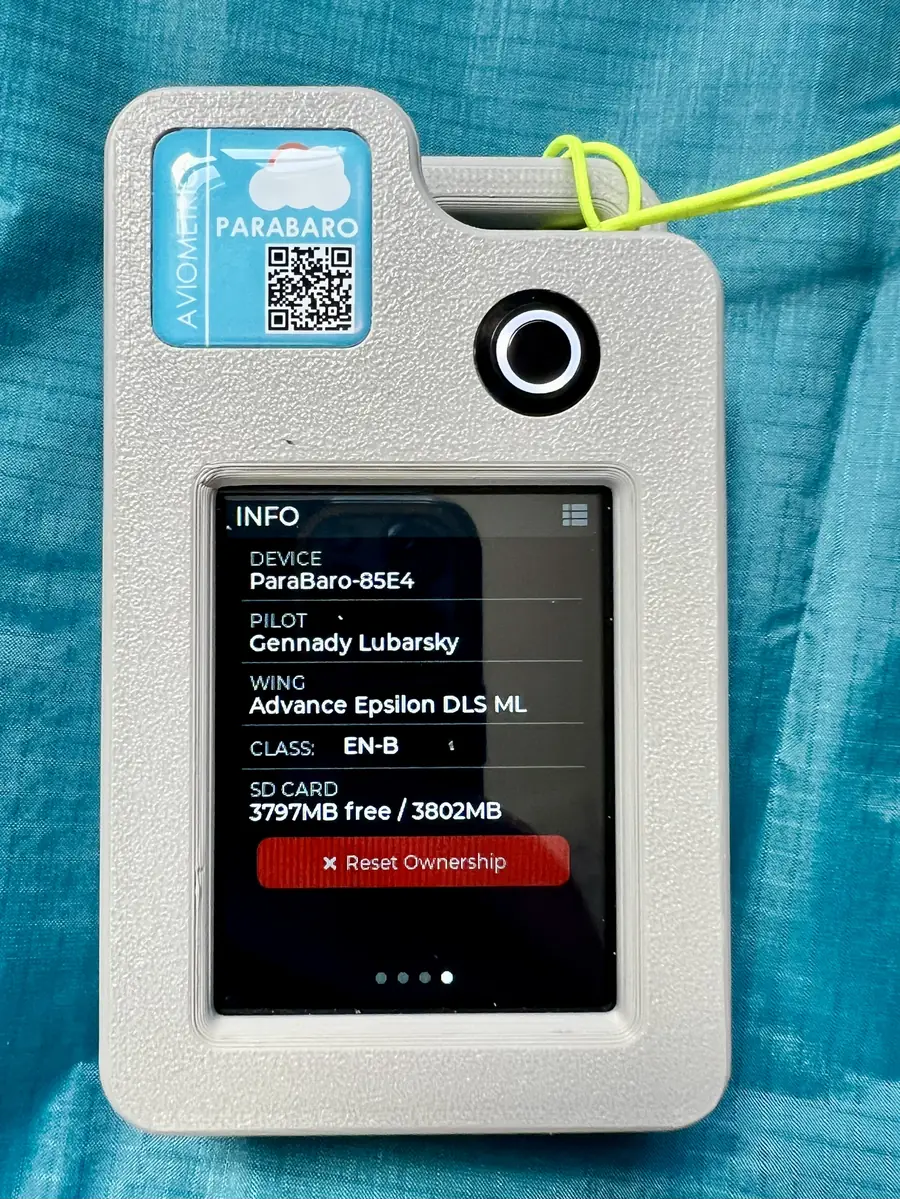
Your pilot and wing details come from your profile on the website. Because your receiver is registered to your account, every flight it uploads is automatically filed under you with the correct wing — there is nothing else to enter on the device itself.
Before Each Flight
2.1 Power On
Press and hold the power button for 2 seconds until the display lights up. The boot screen shows the firmware version, then the receiver begins searching for your sensor nodes.
The boot sequence proceeds as follows:
- Boot screen (firmware version displayed)
- Sensor search — the display shows module connection progress (1/4… 2/4… 3/4… 4/4)
- GPS acquisition begins (may take up to 2 minutes on first use or after a long break)
- Transition to the Flight screen once all 4 sensor modules are connected (4/4)
2.2 Pre-Flight Check
Before launching, confirm all three of the following on the Flight screen:
- Both sensor nodes connected — green indicators for left and right nodes
- GPS lock — GPS indicator shows a fix (turns green when ready)
- Battery level — receiver shows sufficient charge for your planned flight. Receiver battery lasts 4–6 hours with GPS, BLE, display, and audio all active.
Do not fly without both nodes connected. Without sensor data, the inflation arc display will not function.
During Flight
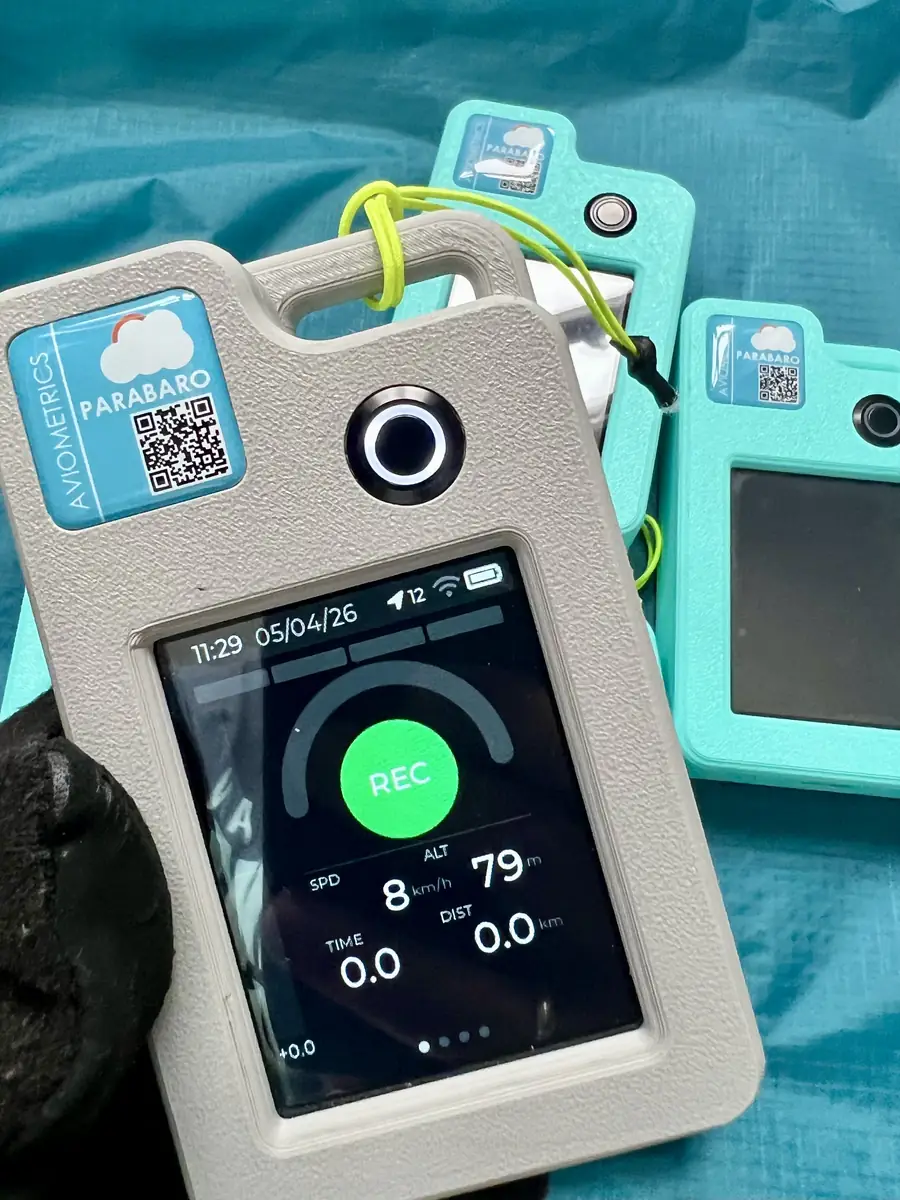
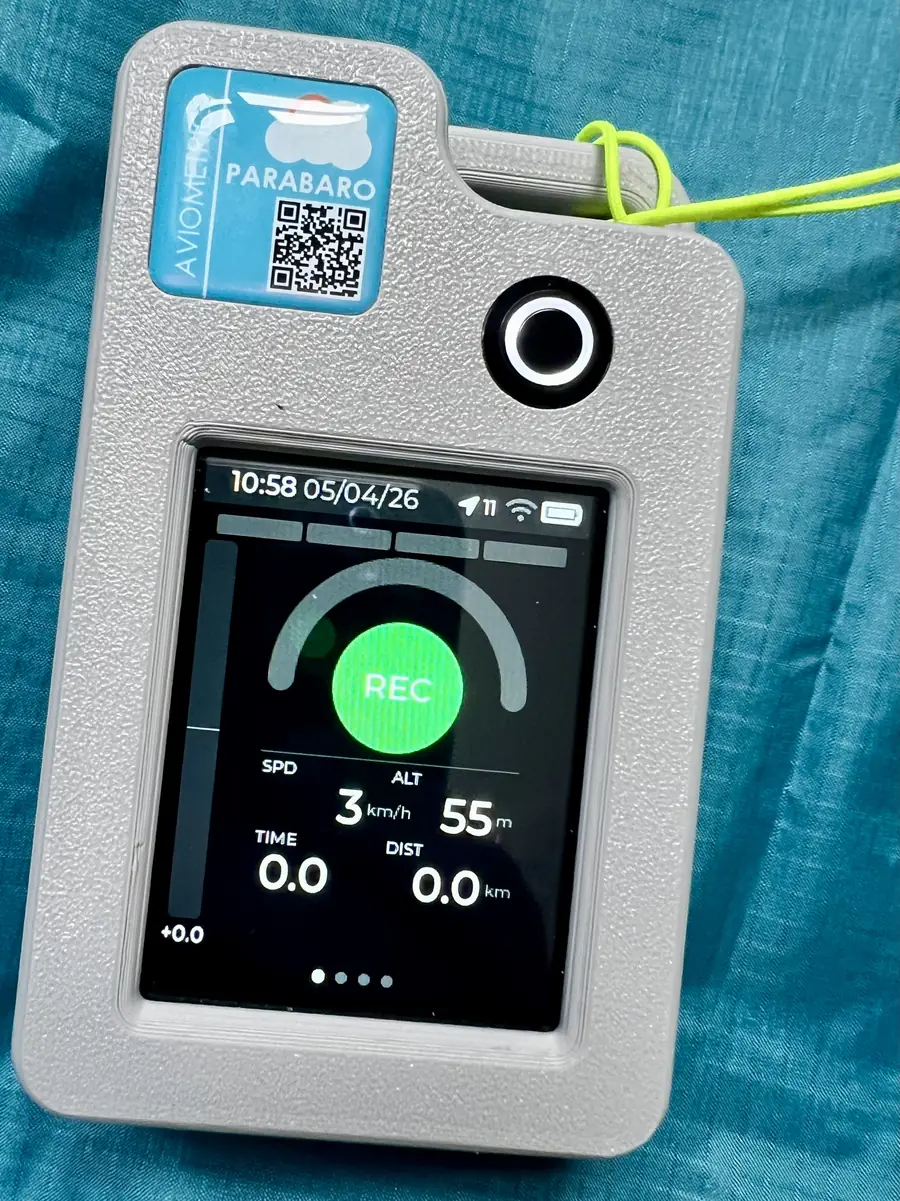
3.1 The Flight Screen
The Flight screen is the primary display during flight. It shows:
- Vario bar — real-time climb and sink rate
- Dual inflation arcs — left and right wing pressure status displayed as arc gauges. Each arc represents the differential pressure (internal minus ambient) at that node position.
Arc colour changes indicate changes in wing pressure status. A drop toward ambient pressure on either side is shown visually in real time.
Swipe the touchscreen to navigate between screens. The Flight screen is the default and the one to use during active flying.
3.2 Recording
Flight recording can be configured in two ways:
- Auto-start: The receiver detects launch automatically and begins recording when flight is detected. Auto-land detection stops recording after landing. This is the default mode.
- Manual: Press the REC button to start and stop recording.
When recording is active, the display shows a recording indicator. ParaBaro logs three file formats simultaneously:
- IGC — competition-valid GPS track at 1 Hz, compatible with XContest and FAI platforms
- CSV — full sensor data at 10 Hz, including pressure readings, IMU data, GPS, and timestamps
- PBB — binary format for efficient on-device storage
All flights are saved to the microSD card inside the receiver.
3.3 Audio
The receiver has a built-in speaker. Audio features active during flight include:
- Audio vario — climb and sink tones. The vario tone profile is configurable in settings.
- Voice announcements — altitude readouts, thermal detection, and other flight events announced by voice.
- Inflation arc indicators — visual colour changes on the arcs show wing pressure status. Audio-based pressure-asymmetry indicators are being developed as the system is validated on beta flight data.
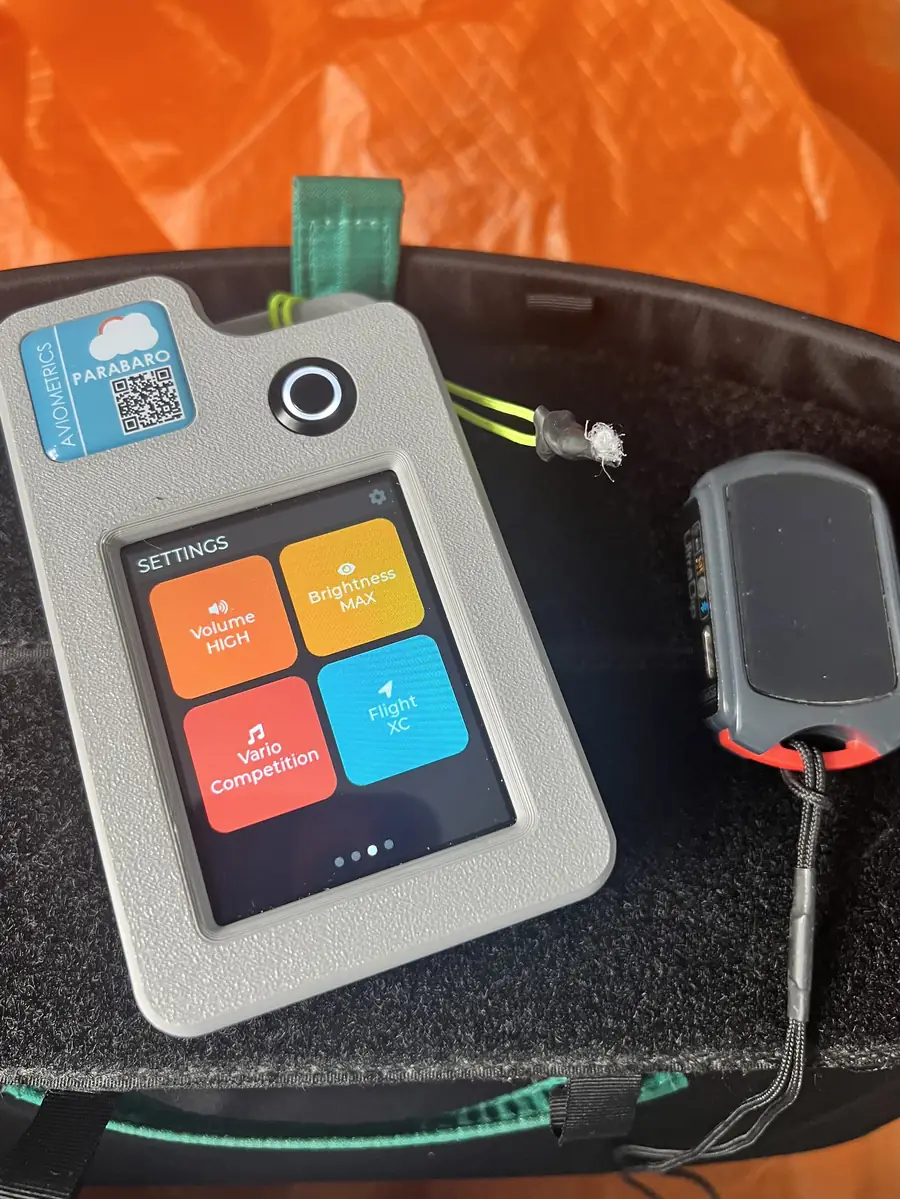
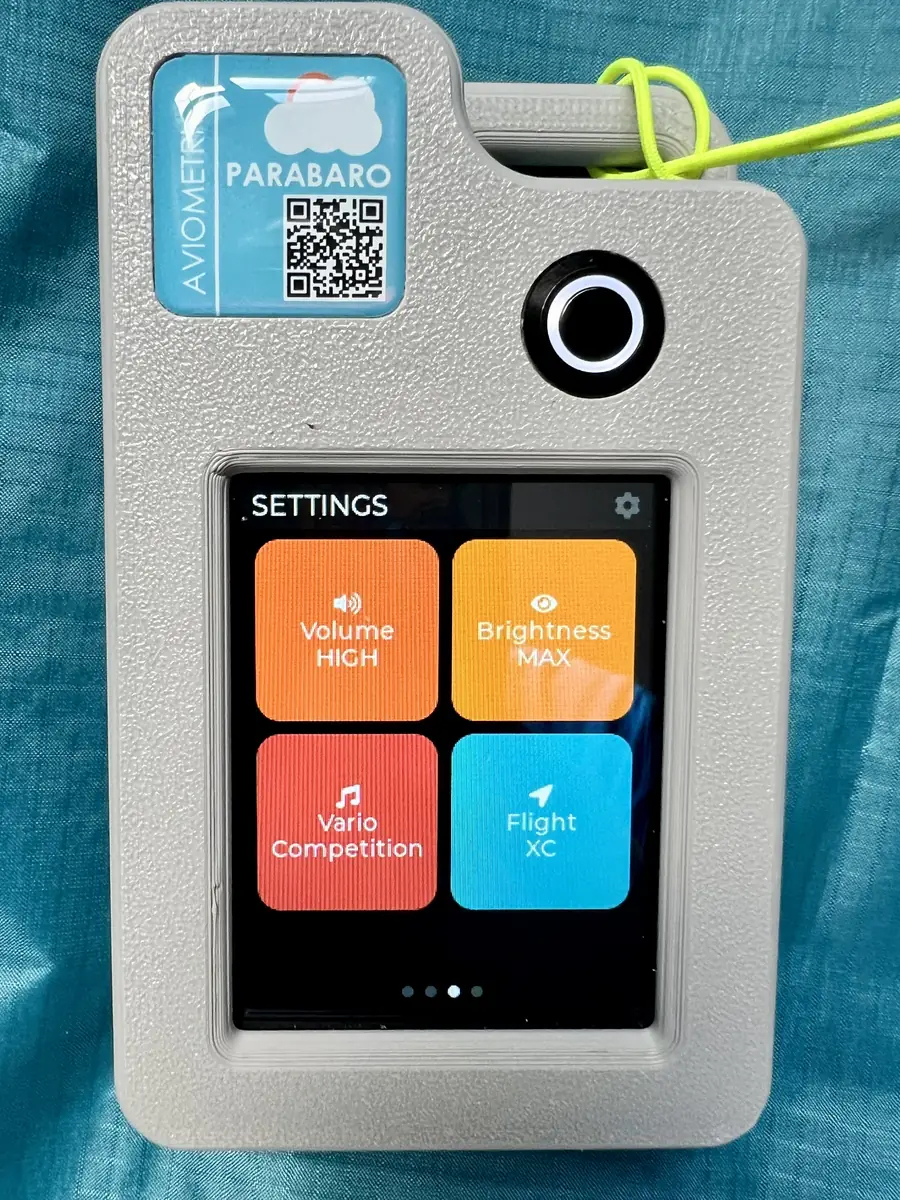
Volume is adjustable in the settings screen.
3.4 What to Watch For
During normal flight, both inflation arcs should show steady, symmetrical pressure. Pay attention to:
- Arc colour changes on either side — these indicate changing pressure at that wing position
- Asymmetry between left and right arcs — one arc lower than the other can indicate a developing asymmetric load
The audio vario continues to provide climb and sink information throughout the flight. Keep both ears and eyes active — the display is a supplementary awareness tool, not a replacement for standard flying skill and lookout.
After Landing
4.1 Stop Recording
If auto-land detection is enabled, recording stops automatically a short time after you land. If using manual mode, press the REC button to stop.
The flight is saved to the microSD card immediately when recording stops. You can see a summary of the completed flight on the Stats screen.
4.2 Upload Your Flight
Three methods are available to transfer flight files from the receiver to your computer or phone:
4.3 View Your Data
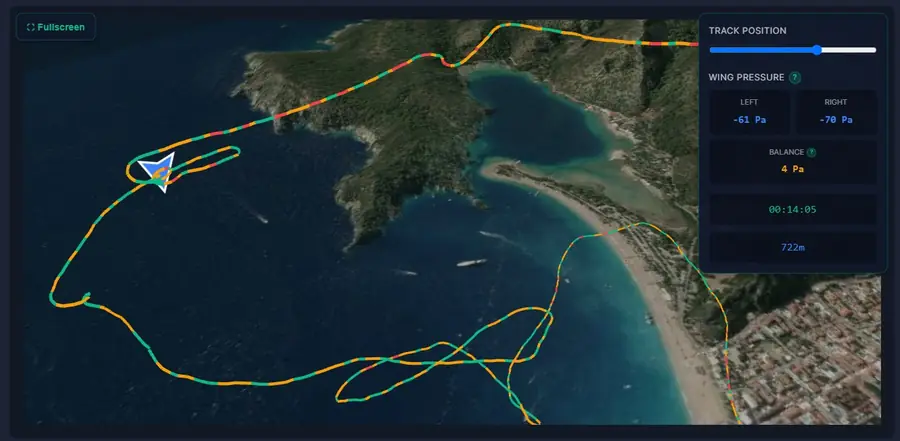
Once uploaded, your flight appears in the pilot dashboard at aviometrics.com. The dashboard shows:
- Flight track on a map
- Pressure timeline for left and right nodes
- Wing asymmetry events with timestamps
- Vario history and altitude profile
Earn-back credits are calculated automatically after each flight is uploaded, based on flight type and duration.
Device Care
5.1 Receiver
- Store in a dry place when not in use.
- Charge before the battery fully depletes. Receiver battery life is 4–6 hours of active use.
- Clean the screen with a soft, dry cloth. Do not use solvents.
- The receiver is designed for outdoor use but does not carry a formal IP water resistance rating. Avoid submersion and extended exposure to heavy rain where possible.
5.2 Sensors
- Sensors are intended to stay in your wing between flights throughout the season. No action is needed between flying days.
- Sensors enter light-sensing deep sleep when your wing is packed away in a dark bag. They wake automatically when you unpack.
- Recharge sensor modules via USB-C when needed. Sensor battery is designed to last a full season, but check charge if the device has been stored for several months.
- Remove sensors at the end of the season or before long-term storage. Removal takes under a minute per node.
5.3 SD Card
- Flight files accumulate on the microSD card over time. Back up files to your computer periodically.
- The card supports up to 256 GB (FAT32 format). Most pilots will not fill it within a season.
- Format the card only if you experience recording problems and have first backed up all files. Format via the Settings screen on the receiver, not on a computer, to ensure FAT32 compatibility.
Troubleshooting
Sensors not connecting on boot
Ensure both sensor nodes are charged. Move the receiver closer to the wing during boot — BLE range is sufficient for normal flight use but a crowded launch field can slow initial connection. Power cycle the receiver and wait for the full boot sequence to complete.
GPS not acquiring a fix
Stand outside with a clear view of the sky. GPS fix can take up to 2 minutes on first use or after a long gap since last use. The GPS indicator on the Flight screen turns green when a fix is achieved. Do not launch until the indicator is green.
No recording when I press REC
Check that the microSD card is properly inserted in the receiver. Check that the card has available space. If using auto-start mode, the receiver will begin recording automatically on launch — you do not need to press REC. Confirm the recording mode in the Settings screen.
Cannot upload files via USB
Check that the USB cable is fully seated at both ends. The receiver must be powered on for USB mass storage mode to activate. Try a different USB port on your computer. Some USB cables are charge-only — use the cable included in the box or a confirmed data cable.
Cannot connect via Bluetooth
Ensure Bluetooth is enabled on your phone or computer. Close and reopen the ParaBaro app. Make sure the receiver is powered on. Only one Bluetooth connection is active at a time — if the receiver is connected to a phone, disconnect that first before trying from a computer.
Battery draining faster than expected
Reduce display brightness in the Settings screen — the backlight is the largest power draw. Audio uses significantly less power than the display. The rated 4–6 hour battery life assumes all features active at moderate brightness. Long XC days may require carrying a power bank for USB-C top-up.
Sensor module not holding to wing
The internal and external modules must be directly opposite each other through the fabric for the magnets to engage properly. Try sliding the internal module slightly forward or back inside the cell to align it with the external module. A small amount of movement is normal — the modules will self-align when they are close enough.